EDIT GRID

Once in the edit grid mode the bottom actionmenu of your CMS will change presenting many new editing options. The bottom actionmenu should look like this:


In the edit grid mode there are seven main editing options which correspond to the functions in the edit mode. Through these main seven options you will be able to add elements and organize the layout of your webpage. The options are:

1. Plug-in - for editing plug-ins, please see page.
2. Link - edit individual links, tell your website what to open when the specific link is clicked.
3. Image link -  edit your image links, tell your website what to open when the specific
link is clicked.
4. Text line - edits short lines of text which do not need advanced editing options.
5. Text area - edit articles, stories or other longer pieces of text which need advanced editing options.
6. Image - edit and place images in the selected area.
7. Color bar - allows you to edit your color bars.

Of course you may arrange the elements in anyway you want or use only the elements you need on the specific page you are making.

The last five options in the bottom panel are:

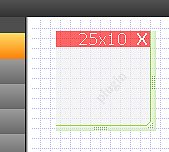
8. Increase grid – pressing this button will increase the grid area of your webpage, making the whole page longer.
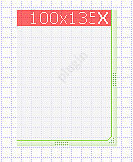
9. Decrease grid – pressing this button is just the opposite it will decrease the grid area and make your webpage shorter.
10. Save – after inserting all the elements you should press this button to keep the changes
11. Save as – this interesting option allows you to save the page your building as a template. It lets you reuse the page you are making, so that you can fast and simple make similar pages/subpages in your website. You won’t have to start from scratch, but simply select an already finished Template to use. We will discuss how to make and use templates in the pages management section.
12. Cancel – you should already be familiar with this button, pressing it sends you to the view section of your CMS.

If you want to add any new element to a certain webpage, the edit grid section is where you will have to go.

insert image here

Here we will show an example of using the grid mode.


Assuming you are starting from an empty page, while in the edit grid mode, and you pressed all the buttons one by one from 1. to 7. you would see seven boxes, with a little white cross on the red square in their top right corner, piled up one on top of each other. Since all the boxes would be on top of each, in reality it would look like one box. That is because the default position for creating any element is the same (top left corner of the grid).  
You may move your elements by clicking and holding the top green part of the square and then moving them to the desired position.
If you now moved all the squares one by one from the starting position and located them around the grid you might get something like this:

insert image here

Each of the boxes has his name (according to his role) in the background written in gray color. Thanks to this you will be able to put the exact box in corect place on the page while in the edit grid mode.

Another interesting thing is that while you are moving box on the page there is a red line with numbers showing on the top of box. The first number before "x" is telling us how far form the left side of the page we are and the second number is telling how far from the top of the page we are (unit of measurement is in pixels). Look on the picture below:

insert image here
insert image here

When you want to change the size of the box to the define dimensions you have to hover a mouse over the right or bottom edge of the box then clik and resize to the dimension you want to. While doing this you will see that on the top of the box there will be a red line showing the size of your box. It will help you define any size of the box you want.

insert image here

When you try pressing the save button everything will change. Doing this will automatically save your changes and take you to the view section. Your grid should now look like this:

Pressing any of these square elements, while in the edit mode, will open the specific edit box depending on the element you choose.
If you for example want to have a wide text field, simply enlarge the textbox by grabbing the right side of it and drag it to the place you want the text to stop. Remember to keep the left mouse-button down while dragging it, and then let go.


Again in short:
- The view mode allows you to view your website
- The edit mode is mainly used for installing new elements in the predefined square elements or updating existing elements. 
- The edit grid mode is used for defining elements and positioning them on the grid; that is laying them out on your webpage.